

As an Amazon Associate I earn from qualifying purchases.
One of the most valuable outdoor skills you can learn is how to read a trail map. While GPS apps and smartphones have made navigation easier than ever, technology isn’t always reliable. Batteries die, cell service disappears, and electronic devices can fail when you need them most.
Knowing how to read a trail map gives you the confidence to explore new places safely, make informed decisions on the trail, and avoid getting lost. Whether you’re planning your first day hike or preparing for a multi-day backpacking trip, understanding trail maps is a skill that every outdoor enthusiast should develop.
In this guide, you’ll learn how to interpret map symbols, understand contour lines, estimate hiking distances, identify trail intersections, and navigate with confidence. By the end, you’ll be able to read most hiking maps without feeling overwhelmed.
Read more : Beginner’s Guide to the Outdoors

Plan Your Next Mountain Adventure!
Explore Rocky Mountain Day Hikes with the National Park Map Pack Bundle from National Geographic Trails Illustrated.
🥾 Find trails • 🗺️ Plan your routes • 🏔️ Explore with confidence 🗺️ Get the Map Pack
Why Learning to Read a Trail Map Is Important
Many beginner hikers depend entirely on their smartphones for navigation. While hiking apps are incredibly useful, they shouldn’t be your only navigation tool. A paper trail map doesn’t need batteries, won’t lose signal, and can provide a much broader view of the landscape than a phone screen.
Learning to read a trail map offers several important benefits:
- Reduces the risk of getting lost
- Helps you plan realistic hiking routes
- Improves outdoor confidence
- Allows you to identify landmarks and trail junctions
- Helps estimate hiking time and difficulty
- Makes it easier to respond to unexpected situations
Whether you’re hiking in a national park, state forest, or local nature reserve, understanding your map allows you to make smarter decisions before and during your adventure.
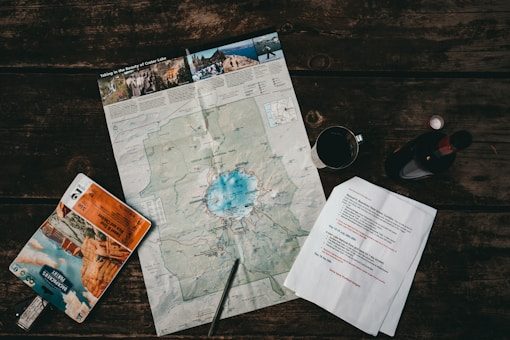
Different Types of Trail Maps
Not every trail map looks the same. Understanding the different types will help you choose the right one for your trip.
1. Park Trail Maps
These maps are designed for visitors and are commonly available at park entrances, visitor centers, or official park websites.
They usually include:
- Marked hiking trails
- Campgrounds
- Picnic areas
- Restrooms
- Visitor centers
- Scenic viewpoints
- Parking areas
Park maps are ideal for beginners because they’re easy to read and focus on essential information.
2. Topographic Maps
Topographic maps provide much more detail about the landscape.
Unlike simple trail maps, they show:
- Elevation
- Hills and valleys
- Ridges
- Rivers
- Lakes
- Forests
- Terrain features
These maps use contour lines to represent changes in elevation and are especially helpful for longer hikes or backcountry adventures.
Pro Tip: Even if you’re hiking on well-marked trails, learning the basics of topographic maps will make you a more confident and capable hiker.
3. Digital Trail Maps
Many hikers now use offline navigation apps alongside paper maps.
Digital maps often include:
- Live GPS location
- Trail difficulty ratings
- Distance tracking
- Elevation profiles
- User reviews
- Downloadable offline maps
While convenient, digital maps should be considered a backup—not a replacement—for basic map-reading skills.

Understanding the Basic Parts of a Trail Map
Before you can navigate confidently, it’s important to understand what you’re looking at. Most trail maps share several common elements.
Title
The title tells you exactly which park, forest, or trail system the map covers.
Always double-check that you’re carrying the correct map for your destination.
North Arrow
Almost every trail map includes a north arrow that shows orientation.
Understanding which direction is north helps you:
- Match your map to the landscape
- Use a compass correctly
- Determine your direction of travel
Many beginners overlook this simple feature, but it’s one of the most important parts of any map.
Trail Network
The trail network shows every official hiking route in the area.
Different trails are often represented using:
- Solid lines
- Dashed lines
- Different colors
- Trail numbers
- Trail names
Pay attention to where trails intersect, split, or end before starting your hike.
Landmarks
Trail maps highlight major landmarks to help you confirm your location.
Common landmarks include:
- Lakes
- Rivers
- Waterfalls
- Bridges
- Shelters
- Campgrounds
- Scenic overlooks
- Parking lots
- Visitor centers
As you hike, compare the landmarks around you with those shown on the map to verify you’re on the correct route.
Understanding Trail Symbols
Maps use symbols to communicate a lot of information without taking up much space. While symbols vary slightly between publishers, many are widely recognized.
Common symbols include:
| Symbol | Meaning |
|---|---|
| ▲ | Mountain peak or summit |
| P | Parking area |
| 🚻 | Restrooms |
| ⛺ | Campground |
| ★ | Scenic viewpoint or point of interest |
| 🌉 | Bridge |
| 💧 | Water source |
| 🚫 | Restricted or closed area |
Always check the map legend because symbols can vary depending on the park or organization that created the map.

How to Read the Map Legend
The legend (sometimes called the key) explains what every color, symbol, and line on the map represents.
Before starting your hike, spend a few minutes reviewing the legend.
It will help you understand:
- Trail difficulty
- Surface types
- Campsites
- Water sources
- Emergency facilities
- Restricted areas
- Seasonal closures
Ignoring the legend is one of the most common mistakes beginners make
How to Read a Trail Map
In this section, you’ll learn the most important map-reading skills every hiker should know, including map scales, contour lines, elevation, and estimating hiking time. These skills will help you plan safer, more enjoyable adventures.
Understanding Map Scale
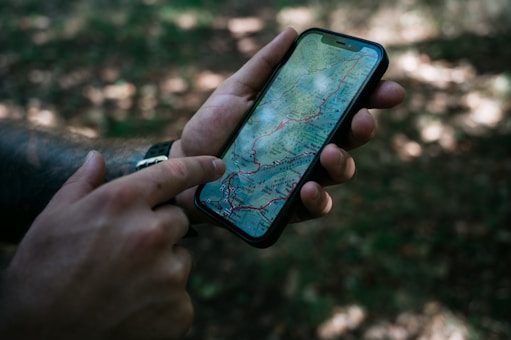
One of the first things you’ll notice on a trail map is the map scale. The scale tells you how distances on the map relate to real-world distances.
For example:
- 1:24,000 means 1 inch on the map equals 24,000 inches (2,000 feet) on the ground.
- 1:50,000 covers a larger area but shows less detail.
Generally:
- Large-scale maps (1:24,000) show more detail and are better for hiking.
- Small-scale maps (1:50,000 or 1:100,000) are better for planning longer trips.
Why Map Scale Matters
Understanding scale helps you:
- Estimate hiking distance
- Plan realistic routes
- Calculate hiking time
- Identify nearby landmarks
- Avoid underestimating difficult trails
Pro Tip: Never assume a trail is short just because it looks short on the map. Always check the scale first.
Measuring Distance on a Trail Map
Most maps include a scale bar that allows you to measure distance.
You can use:
- A ruler
- A compass with a ruler edge
- A piece of string for winding trails
If the trail curves, lay the string along the route, then measure the string against the map’s scale.
This method is much more accurate than estimating by eye.
What Are Contour Lines?
Contour lines are one of the most important features of a topographic trail map. They show the shape and elevation of the land, allowing you to visualize hills, valleys, ridges, and steep slopes before you start hiking.
Every contour line connects points of equal elevation.
Think of slicing a mountain into horizontal layers. Each layer represents one contour line.
Once you understand contour lines, you’ll be able to tell whether a trail climbs gradually or gains elevation quickly.
How to Read Contour Lines
At first glance, contour lines may look confusing, but they follow a few simple rules.
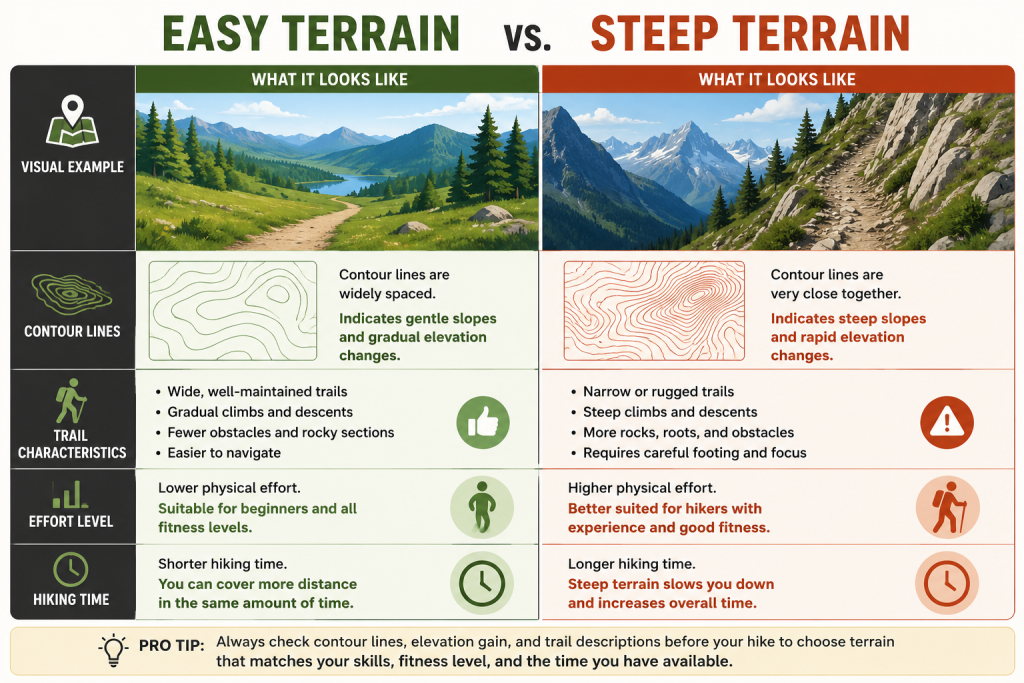
Lines that are close together indicate steep terrain, while lines that are spaced further apart suggest a gentle slope. Pay attention to the direction of the lines, as they can reveal the flow of water and the layout of the landscape. When planning your hike, consider the spacing of contour lines to gauge the effort required for the ascent or descent. Additionally, look for topographic features such as peaks and valleys, which can enhance your understanding of the trail ahead. Familiarizing yourself with these elements will make your hiking experience more enjoyable and less daunting.
Closely Spaced Lines = Steep Terrain
When contour lines are packed closely together, the land rises or falls quickly.
This usually means:
- Steep climbs
- Steep descents
- More challenging hiking
If you’re a beginner, expect these sections to require more time and energy.
Widely Spaced Lines = Gentle Terrain
When contour lines are farther apart, the elevation changes gradually.
These trails are generally:
- Easier to hike
- Less physically demanding
- Better for beginners
- More suitable for families
Closed Circles
Contour lines forming circles usually indicate either:
- A hill or mountain
- A depression (shown with inward tick marks on some maps)
The smallest circle often represents the highest point.
Understanding Contour Intervals
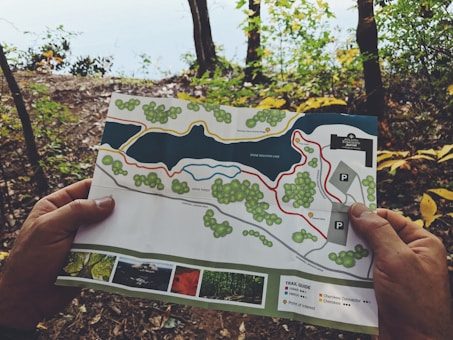
Every topographic map includes a contour interval, which tells you the elevation difference between adjacent contour lines.
For example:
If the contour interval is 40 feet, every line represents a 40-foot change in elevation.
Example:
- Line 1 = 600 feet
- Line 2 = 640 feet
- Line 3 = 680 feet
Knowing the contour interval helps you estimate how much climbing you’ll do during your hike.
Reading Elevation Gain
Many beginners focus only on trail distance, but elevation gain is just as important.
Consider these two hikes:
Trail A
- Distance: 5 miles
- Elevation Gain: 300 feet
Trail B
- Distance: 5 miles
- Elevation Gain: 2,000 feet
Although both trails are the same length, Trail B will usually be much more difficult because of the steep climb.
Always check both distance and elevation gain before choosing a trail.
Read more :How to Choose the Right Hiking Trail for Beginners.

Recognizing Terrain Features
Contour lines also reveal the shape of the landscape.
Here are some common terrain features:
Ridge
A ridge is a long, narrow area of higher ground.
You’ll often enjoy excellent views from ridge trails, but they may also be exposed to strong winds.
Valley
Valleys appear where contour lines form a “V” shape pointing uphill.
Many streams and rivers flow through valleys.
Saddle
A saddle is the low point between two higher areas.
Hiking trails often pass through saddles because they provide easier crossings.
Summit
A summit appears as concentric closed contour lines.
The center usually marks the highest point.

Estimating Hiking Time
Knowing how long a hike will take is an essential planning skill.
While everyone’s pace is different, several factors affect hiking time:
- Distance
- Elevation gain
- Trail conditions
- Weather
- Fitness level
- Pack weight
A Simple Rule for Beginners
A common estimate is:
- 2 miles per hour on easy terrain.
Add extra time for:
- Steep climbs
- Rest breaks
- Photography
- Wildlife viewing
- Difficult terrain
It’s always better to finish earlier than expected than to be caught on the trail after dark.
Identifying Trail Junctions
Trail junctions are places where two or more trails meet.
Maps usually show them with:
- Intersections
- Trail names
- Trail numbers
- Direction arrows
Before reaching a junction, check:
- Which trail you’re currently on
- Which trail you need next
- Nearby landmarks
Many navigation mistakes happen at trail intersections.
Reading Trail Difficulty
Many maps classify trails using colors or symbols.
Common ratings include:
Easy
- Short distance
- Gentle elevation
- Wide trail
- Suitable for beginners
Moderate
- Longer distance
- Moderate climbing
- Uneven terrain
- Requires reasonable fitness
Difficult
- Steep climbs
- Rocky terrain
- Significant elevation gain
- Best for experienced hikers
Choose trails that match your current ability—not your future goals.

Use Landmarks to Confirm Your Location
As you hike, compare what you see around you with your map.
Look for features such as:
- Lakes
- Rivers
- Bridges
- Trail junctions
- Campgrounds
- Scenic overlooks
- Mountain peaks
Regularly checking landmarks helps you stay on course and recognize mistakes early.
Expert Tip: Orient Your Map
Before you begin hiking, rotate your map so it matches the direction you’re facing.
When your map is aligned with the landscape:
- Landmarks become easier to recognize.
- Trail decisions become more intuitive.
- Navigation becomes less confusing.
This simple habit can greatly improve your confidence on the trail.
A comparison graphic of easy vs. steep terrain.
How to Use a Compass with a Trail Map
A trail map becomes even more useful when paired with a compass. While you don’t need advanced navigation skills for every hike, understanding the basics can help you stay on course when trails become confusing.
Pro Tip: A compass doesn’t replace your map—it helps you orient it correctly and identify the direction you’re traveling.
Step 1: Find North on the Map
Most trail maps have a north arrow. Place your map on a flat surface and locate this arrow.
Next, hold your compass flat and allow the needle to settle. Rotate the map until the map’s north aligns with the compass needle.
Once your map is oriented, nearby landmarks should match what you see around you.
Step 2: Identify Your Current Location
Before hiking, determine exactly where you are.
Look for obvious landmarks such as:
- Parking areas
- Trailheads
- Visitor centers
- Rivers
- Lakes
- Trail intersections
Knowing your starting point makes the rest of your navigation much easier.
Step 3: Follow Your Planned Route
As you hike, periodically compare your surroundings to the map.
Ask yourself:
- Am I still on the correct trail?
- Have I passed the expected landmarks?
- Is the trail heading in the planned direction?
Checking your map every 15–20 minutes is much easier than trying to relocate yourself after taking a wrong turn.

Understanding Trail Markers and Blazes
Many hiking trails are marked with trail blazes—painted symbols or signs that help hikers stay on the correct path.
Common blaze colors include:
- White
- Blue
- Red
- Yellow
- Orange
Some parks use shapes instead of colors, such as:
- Rectangles
- Circles
- Triangles
- Diamonds
Always compare the blaze color or symbol with your trail map to ensure you’re following the correct route.

Using GPS as a Backup
Modern GPS apps are excellent navigation tools, but they should complement—not replace—your map-reading skills.
Popular hiking apps often provide:
- Offline trail maps
- GPS location tracking
- Elevation profiles
- Route recording
- Trail reviews
- Waypoints
Before your trip:
- Download offline maps.
- Charge your phone fully.
- Bring a power bank.
- Enable airplane mode to save battery.
Even with GPS, continue checking your paper map throughout the hike.
Read our future article about Best Hiking Apps for Beginners.
Common Trail Navigation Mistakes
Even experienced hikers occasionally make navigation errors. Fortunately, most are easy to avoid.
One common mistake is relying solely on trail signs without regularly checking the map. This can lead to missing important turns or detours that aren’t well marked. Another issue is not paying attention to your surroundings, which can cause you to lose track of where you are. It’s also vital to keep an eye on the time; underestimating how long a trail will take can lead to hiking in the dark. Lastly, always inform someone of your planned route and expected return time for safety.
Starting Without Reviewing the Map
Many hikers begin walking without looking at the map first.
Spend a few minutes reviewing:
- Trail distance
- Major intersections
- Water sources
- Elevation gain
- Emergency exits
Understanding the overall route before you start reduces confusion later.

Walking Past Trail Junctions
Trail intersections are where many navigation mistakes happen.
Slow down whenever you reach a junction and confirm:
- Trail name
- Trail number
- Direction of travel
Never assume the widest path is the correct one.
Ignoring Elevation Changes
Many beginners underestimate steep climbs.
Always check:
- Elevation gain
- Contour lines
- Estimated hiking time
A short trail with significant elevation gain may take much longer than expected.
Relying Only on GPS
GPS devices can fail due to:
- Dead batteries
- Software issues
- Poor satellite reception
- Accidental damage
Carry a paper map as a reliable backup.

Not Checking Your Position Regularly
Don’t wait until you’re unsure where you are.
Instead, make it a habit to:
- Check landmarks
- Confirm trail names
- Compare your surroundings to the map
Frequent small checks prevent major mistakes.
What to Do If You Get Lost
Getting lost can feel stressful, but staying calm is the most important first step.
Avoid rushing or guessing.
Instead, use the STOP method.
S — Stop
Pause immediately.
Continuing without knowing your location often makes the situation worse.
T — Think
Ask yourself:
- When did I last know my location?
- Did I miss a trail junction?
- Have I crossed any streams or bridges?
O — Observe
Look around carefully.
Search for:
- Trail signs
- Landmarks
- Footprints
- Blazes
- Map features
Compare what you see with your map.
P — Plan
Choose the safest option based on your situation.
If you’re confident you recently left the trail, carefully retrace your steps.
If you’re uncertain or conditions are dangerous, stay where you are and wait for assistance if necessary.
8 Best Women’s Hiking Leggings With Pockets

Practical Navigation Tips for Every Hike
Always carry a reliable map and compass, even if you rely on GPS devices. Familiarize yourself with the terrain before setting out, noting landmarks that can guide you. Regularly check your surroundings and adjust your route as needed to stay on course. Establish a communication plan with your hiking companions, including specific meeting points in case anyone becomes separated. Lastly, practice using navigation tools in a safe environment before your hike to build confidence and skill.
Small habits can dramatically improve your navigation skills.
Study the Route Before Leaving
Review:
- Trail length
- Elevation profile
- Major landmarks
- Water crossings
- Possible exit routes
Preparation builds confidence.
Take Photos of Trail Maps
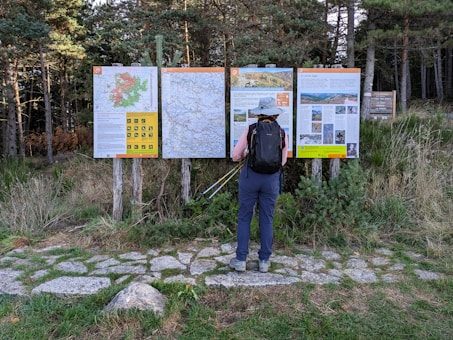
Many trailheads display large information boards.
Take a photo before starting your hike.
This provides a backup if your paper map gets wet or damaged.
Mark Important Locations
Highlight:
- Parking area
- Campsite
- Water sources
- Emergency shelters
- Trail junctions
These reference points make navigation much easier.
Keep Your Map Accessible
Avoid packing your map deep inside your backpack.
Instead:
- Store it in an outside pocket.
- Use a waterproof map case.
- Fold it to show your current route.
Easy access encourages frequent map checks.

Build Navigation Skills Gradually
Map reading is a skill that improves with practice.
Start with:
- Local parks
- Short hiking trails
- Well-marked routes
As your confidence grows, gradually explore longer and more challenging hikes.
Every trip teaches you something new.

Beginner Trail Navigation Checklist
Before leaving home:
✅ Download offline maps
✅ Pack a paper trail map
✅ Carry a compass
✅ Check the weather
✅ Tell someone your plans
✅ Charge your phone
✅ Bring a power bank
✅ Pack extra water
✅ Review your hiking route
✅ Learn the trail difficulty
Completing this checklist takes only a few minutes but can greatly improve your safety.
How to Choose the Best Hiking Socks to Prevent Blisters
“Hiker using a compass and trail map to navigate a forest hiking trail safely.”
To make this article stand out in Google Search, add a short section titled “Expert Tip” or “From Our Experience” after one or two major headings. For example:
Expert Tip: Before every hike, I spend a few minutes identifying major landmarks—such as trail junctions, streams, and scenic overlooks—on the map. This simple habit makes it much easier to confirm I’m on the correct route without constantly checking my phone.

Frequently Asked Questions
1. What is a trail map?
A trail map is a navigation tool that shows hiking trails, trail intersections, landmarks, elevation changes, campsites, water sources, and other important information to help hikers safely navigate an outdoor area.
2. Do I need a trail map if I have a GPS?
Yes. GPS devices and smartphone apps are excellent tools, but batteries can die, devices can fail, and signals may be unavailable. A paper trail map is a reliable backup that every hiker should carry.
3. What are contour lines on a trail map?
Contour lines connect points of equal elevation. They help hikers understand the shape of the landscape, including hills, valleys, ridges, and steep terrain.
4. How can I tell if a trail is steep?
Look at the contour lines.
- Closely spaced lines indicate steep terrain.
- Widely spaced lines indicate gentle slopes.
The closer the lines, the more elevation you’ll gain over a short distance.
5. What does the map scale mean?
The map scale shows how map distances relate to real-world distances.
For example, a 1:24,000 scale means one inch on the map represents 24,000 inches (2,000 feet) on the ground.
6. Should beginners use a compass?
Yes. Learning basic compass skills is highly recommended. Even if you mostly use GPS, knowing how to orient a map with a compass improves navigation and confidence.
7. How often should I check my trail map?
A good habit is to check your map every 15–20 minutes or whenever you reach a trail junction, cross a stream, or pass a major landmark.
8. Can I hike using only a phone?
It’s not recommended.
Phones are excellent navigation tools, but they shouldn’t be your only option. Always carry a paper map and a fully charged power bank.
9. How can I improve my map-reading skills?
Practice on short, well-marked trails.
The more often you compare your surroundings with your map, the more confident you’ll become at recognizing terrain, landmarks, and trail junctions.
10. What is the biggest navigation mistake beginners make?
The most common mistake is relying entirely on GPS without understanding the trail map. Learning basic map-reading skills provides an extra layer of safety and helps you make better decisions outdoors.
7 Best Women’s Running Shoes For Beginners

Final Thoughts
Learning how to read a trail map is one of the most valuable outdoor skills you can develop. While modern GPS technology has made navigation easier, nothing replaces the confidence that comes from understanding your surroundings and knowing how to interpret a map.
Start by practicing on easy, well-marked trails. Learn to recognize contour lines, trail symbols, landmarks, and junctions before taking on more challenging hikes. Over time, these skills will become second nature and allow you to explore new places with greater confidence.
Remember that safe navigation isn’t about memorizing every symbol—it’s about developing the habit of planning ahead, checking your location regularly, and making informed decisions on the trail.
The more you practice reading trail maps, the more enjoyable and rewarding your outdoor adventures will become.